How to Spot Mold Hidden Behind Bathroom Tile and Fixtures
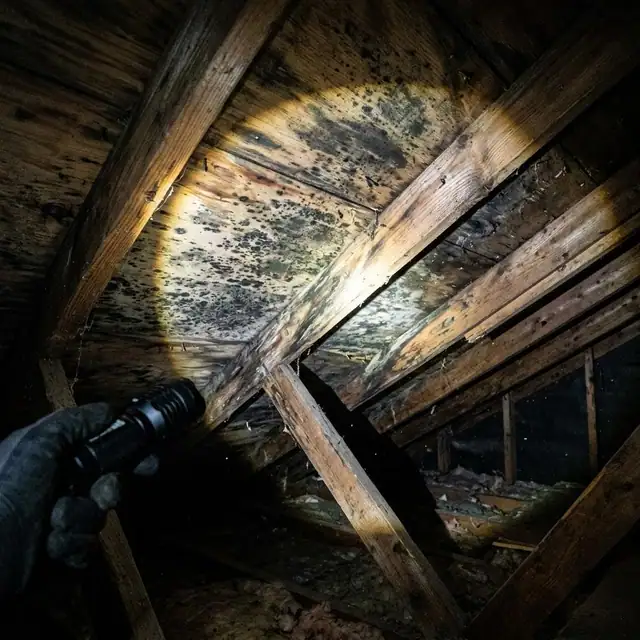
Bathrooms see more moisture than any other room in a house. Showers, baths, sinks, and toilets release steam and water day after day. Even with good ventilation, some of that moisture finds its way behind tile, under fixtures, and into wall cavities. When it stays there long enough, mold begins to grow out of sight. By the time you notice a musty smell or a discolored grout line, the mold may have already spread across a much larger area than what is visible.
Knowing the signs of hidden mold is important because surface cleaning alone will not fix the problem. If moisture continues to feed mold behind the walls, the colony keeps growing and can damage materials like drywall, wood studs, and tile adhesive. A careful bathroom mold inspection looks past what you can see and checks for clues that point to growth behind the surfaces. This article explains what those clues are, how to check for them, and what they mean for the health of your bathroom.
Why Mold Prefers the Space Behind Tile and Fixtures
Tile is not waterproof on its own. The waterproof layer in a tiled shower or tub surround is the membrane or backing behind the tile, not the tile itself. Grout is porous, and over time it develops tiny cracks. Water seeps through those cracks and collects between the tile and the waterproof membrane. Once moisture is trapped there, it has no easy way to evaporate. The dark, damp environment is perfect for mold spores, which are always present in household air. Given warmth and a steady supply of organic material (soap scum, skin cells, dust), mold colonizes quickly. The same thing happens around fixtures: a loose escutcheon on a pipe, a cracked caulk bead around a faucet base, or a poorly sealed shower head arm all let water slip behind the fixture and into the wall.
Hidden mold is not just an aesthetic problem. It can weaken the structure behind the tile. Mold feeds on the paper facing of drywall and the cellulose in wood studs. Over time, the material becomes soft, crumbly, and less able to hold the tile in place. That can lead to loose tiles, cracked grout, and eventually a need for a full tear-out. The earlier you catch hidden mold, the less damage it does.
Visible Signs That Point to Hidden Growth
You do not need to remove tile to find mold. Some signs are visible on the surface, even if the mold itself is not. These are the first things to look for during a bathroom mold inspection.
Discolored or Bulging Grout
Grout naturally darkens with age and dirt, but patchy discoloration that is darker in some areas than others may indicate moisture wicking up from behind. If the grout feels damp to the touch even after the bathroom has been dry for hours, water is likely trapped behind it. In more advanced cases, the grout may bulge or crack as the material behind it swells.
Peeling or Bubbling Paint on Adjacent Walls
If the wall next to a tiled shower or tub shows blisters, bubbles, or peeling paint, that is a strong sign that moisture is migrating outward from behind the tile. The water does not stay put; it moves through the drywall or plaster and lifts the paint film. Run a hand over the area. If it feels cooler or slightly damp compared to the rest of the wall, you are probably feeling moisture that is being wicked through the material.
Soft Spots on Drywall or Caulk
Press gently on the wall around the shower or tub. If the drywall gives slightly, it has likely been softened by moisture. The same goes for caulk: if the bead around the tub or countertop is no longer firm and springy but feels mushy, water has gotten behind it. Once caulk loses its seal, it is only a matter of time before mold follows.
Musty Smells That Persist Even After Cleaning
Your nose is one of the best tools for detecting hidden mold. A musty, earthy odor that returns a day or two after a thorough cleaning means there is a source of mold that you cannot see. The smell is caused by microbial volatile organic compounds (mVOCs) released by growing mold. If you can smell it but cannot see it, the colony is likely behind a surface. Track the smell to its strongest point: that is where you should focus your inspection.
Water Stains on Ceilings or Flooring Below
If the bathroom is on an upper floor, check the ceiling below. Yellow or brown stains, especially those that grow or darken after a shower, indicate a leak from above. The same goes for the floor around the toilet or vanity. Water stains are not always accompanied by active dripping; sometimes they come from slow seepage that evaporates between uses. That slow seepage is ideal for mold growth.
How to Inspect Without Damaging the Surface
Before you start prying up tiles or cutting into drywall, try less invasive methods. A moisture meter is a useful tool. It measures the moisture content of wood, drywall, and tile backer board without leaving a mark. Many models have pins that press into the surface, but there are also pinless meters that use electromagnetic fields. Run the meter over the grout lines and the wall surface. If the reading is higher than the surrounding area, moisture is present behind the surface. Compare readings from different spots to find the wet zone.
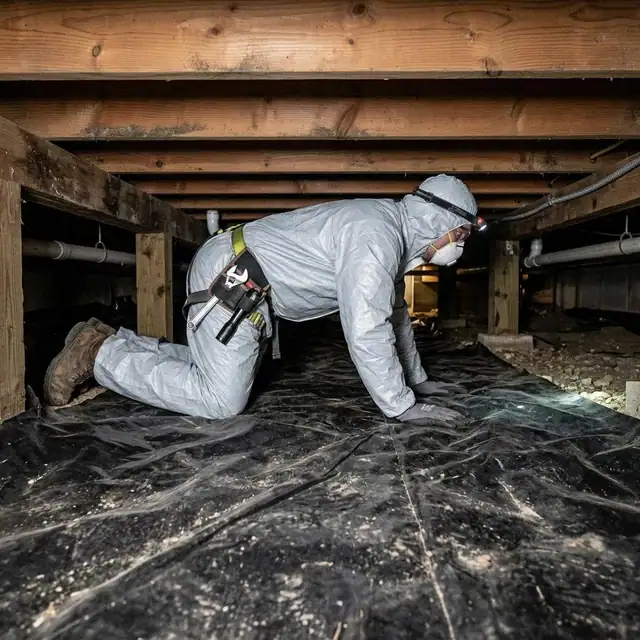
Another low-impact test is the touch test. After a shower, wait thirty minutes and then feel the wall in several places. If some areas stay warm and others feel cool, the cool spots may be evaporating moisture that has soaked through. You can also press a piece of plastic wrap against a suspect area and seal the edges with tape. Leave it for 24 hours. If condensation forms on the inside of the plastic, moisture is moving through the wall from behind.
For a more thorough check, you can remove the escutcheon plate (the decorative cover) around a pipe or valve. Shine a flashlight into the gap. Look for dark growth, dampness, or a layer of slime around the pipe. If you see mold here, it has almost certainly spread further into the wall cavity. The same approach works around the base of a toilet or the flange of a sink drain.
What to Do If You Find Signs of Hidden Mold
Finding evidence of hidden mold does not automatically mean you need to rip out the whole bathroom. It does mean you need to address the moisture source and assess how far the mold has spread. Start by stopping the water flow. If the problem is a leaky pipe or a failing seal, repair that first. Drying the area is critical; use fans, a dehumidifier, or a heater to pull moisture out of the wall cavity. Opening a small access hole can help air circulate behind the tile. Once the area is dry, you can see the true extent of the mold.
Small patches of mold on the back of drywall can often be cleaned with a proper mold remediation product. Larger colonies, especially those that have softened the wall material, usually require cutting out and replacing the affected section. Tile may need to be removed carefully and reinstalled after the wall cavity is cleaned and dried. This is where professional help often makes sense. A bathroom mold inspection by a qualified remediation service can determine whether the mold is contained or has spread to adjacent studs and insulation.
Preventing Hidden Mold from Returning
Once the mold is removed and the damaged materials are replaced, prevention becomes the focus. The most important step is keeping moisture out of the space behind the tile. That means maintaining the seals: re-caulk around tubs, showers, sinks, and toilets at least once a year, or whenever you see cracks or gaps. Use a high-quality silicone caulk designed for wet areas. Check the grout for cracks and reseal it every year or two with a penetrating sealer. Make sure the bathroom exhaust fan runs for at least 20 minutes after each shower and that it vents to the outside, not into an attic or crawl space.
Consider the ventilation behind the tile itself. In some older bathrooms, there is no waterproof membrane behind the tile; the tile was set directly on drywall. That design practically guarantees moisture problems over time. If you are remodeling, install a cement backer board with a waterproof coating, and use a moisture-resistant vapor barrier behind it. For existing bathrooms, you can improve drainage by ensuring the shower pan or tub has a proper slope toward the drain so water does not pool at the edges.
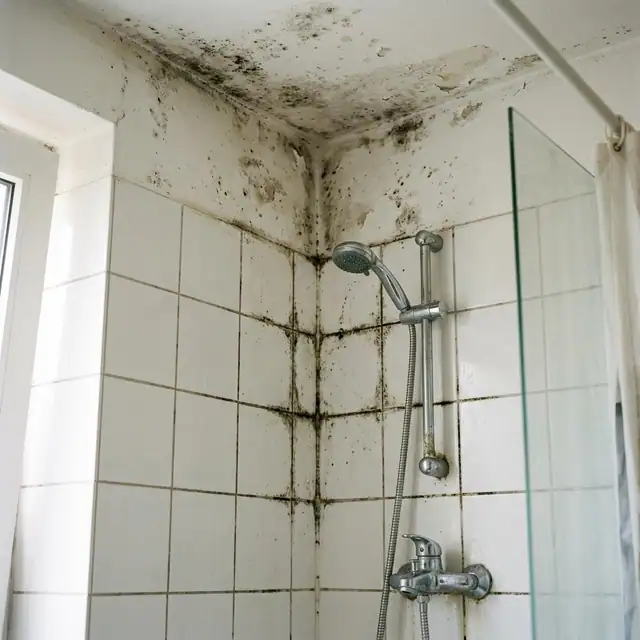
For ongoing monitoring, keep an eye on the signs mentioned earlier. A quick monthly check of grout, caulk, and paint condition takes only a few minutes and can catch small problems before they turn into major mold issues. If you notice a musty smell returning, investigate right away. Early action is always easier and cheaper than a full remediation.
For homeowners in the Boston area, Mold Removal Boston Pros offers comprehensive bathroom mold inspection and remediation services. They address visible growth, hidden moisture, damaged materials, and ventilation problems as part of a complete approach. Their team can help determine whether the signs you are seeing point to a contained issue or a larger problem behind the walls. You can learn more about their process at moldremovalboston.org. Many local homeowners have found that a professional assessment gives them a clearer picture of what is happening inside their walls and what it will take to fix it.
Hidden mold behind tile and fixtures is a common problem in bathrooms, but it is not something you have to live with. By learning the signs and performing regular checks, you can catch it early and prevent the damage from spreading. A thorough bathroom mold inspection, whether done by you or by a professional, is the first step toward a healthier, longer-lasting bathroom. Mold Removal Boston Pros can guide you through that process and provide a lasting solution tailored to your home.